


Stampin’ Up products used: Baby Bundle stamp set, 5/8” very vanilla satin ribbon, 1/8” daffodil and very vanilla taffeta ribbon, daffodil, cherry cobbler, glossy white cardstock, glue dots, dimensionals, Island Oasis designer paper, bone folder to curl petal edges, small brad, 1 ¾” scallop punch, Boho Blossoms punch, 5-petal flower extra-large flower punch, 1-1/4” circle punch, and Beautiful Wings embosslit die (also used 9” round tulle circle and clothespin painted white).
Prepare 5 layers as follows:


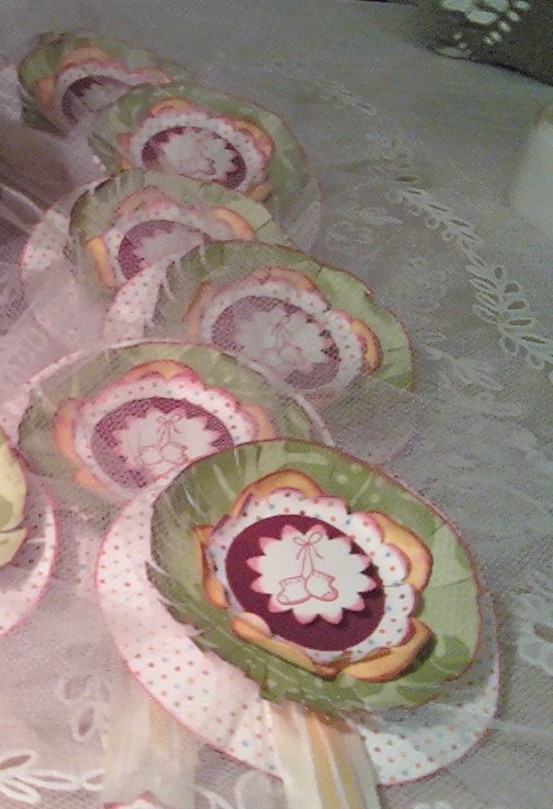
1) Cut a 3-1/4” circle from Island Oasis polka dotted paper for BASE and distress edge in cherry; pleat and staple tulle to this circle as shown in picture. Also cut 4” length of satin ribbon, 5” daffodil ribbon and fold in half, and 6” length of very vanilla ribbon and fold in half. Attach ribbons to BASE.


Here is what the back will look like after you staple the tulle and ribbon:

2) Cut a 2-3/4” circle from green Island Oasis – this size is the same size as the ribbon spool! Distress edges with cherry, then cut slits in from edges of circle and carefully curl with bone folder, then fluff.


3) Punch a daffodil 5-petal extra-large flower, distress edges with cherry, and crumple and uncrumple it two times so the cardstock softens up. Then dab it in cherry to give it a shabby chic look and curl edges with bone folder.

4) Punch a 1-3/4” scallop circle from Island Oasis polka dot paper, distress edges with cherry, and cut slits in from edges. Curl edges with bone folder.

5) Punch a 1-1/4” circle from cherry cobbler cardstock and distress edge with cherry cobbler.

Use a brad to put all 5 layers together. Stamp baby bootees on glossy white cardstock and punch out using large Boho Blossoms flower, distress edges with cherry cobbler. Attach to other layers on top of brad with dimensionals.


Using the Boho Blossoms, punch medium flower from green Island Oasis and small flower from Island Oasis polka dot paper – distress edges with cherry cobbler. Use the eraser end of a pencil to stamp the center of the small flower with cherry cobbler. Attach small flower to medium flower, then attach to end of very vanilla satin ribbon.


Prepare the clothespin: You don’t have to paint it if you don’t want to since it won’t show, but I had already painted a bunch of clothespins white, so Iused them. Thread a 15” length of the satin ribbon through the metal hole in the clothespin (this can be challenging!), then tie it in a knot leaving about 1-1/2” ends. I found that tying the knot was a lot easier if I put the clothespin on the edge of a box so they were standing up….Put on 3 or 4 glue dots on clothespin and carefully place the layers on the clothespin to attach. You use hot glue if you wanted instead. This was my first time really using the glue dots, and boy, are they fiercely strong – I got one stuck to my little pinky, and when I pulled it off, it took my nail polish right off, see here?


Finish the baby clothespin holder up: Cut a leaf from the Island Oasis green leafy paper and cut the edges following the leaf outlines, then distress it with cherry cobbler (have you noticed that almost everything is distressed with cherry?!) and adhere to the back of the other layers on the clothespin. Attach one of the butterflies from the Beautiful Wings embosslit diecut with a dimensional to the leaf (feel free to distress it too if you want!). Turn the baby clothespin over and glue the ribbon down alongside the clothespin so it will hang properly straight. That’s it!


Now you can make more of them and hang them up off each other for a vertical banner, on a present, a party favor, different color schemes, etc.….What a great way to use a plain and simple clothespin, don’t you think?


BTW, you will need a helper too – here is my assistant! The second picture Inu "posed" for...!! (she was told to Stay so I could take her picture...) See the box that I put my items into that I was using that says “Cheese Danish?” No, I didn’t eat them all – only one - really LOL! It made a great recycling box!!


Beautiful Mary. Thanks for the excellent tutorial!
ReplyDeleteOops...forgot to say you have a lovely assistant too! Perfect for a picture to hang on the clothespin! Really good at that stay command too..wish I could teach my cat that!
ReplyDelete