Saturday, December 31, 2011

More magnetic mini-calendars

 These are the rest of the magnetic mini-calendars I made for Christmas presents this year.  I made deer, dogs, birds, and a cat calendar. 


 Most of the supplies are Stampin Up (retired or current) - the diecuts are from other companies...


I used little pearls and rhinestones for embellishments.


This last picture is my favorite picture because of the reflection of the cards on the counter...In reality the counter is not all that shiny but with the reading light on it, it casts an interesting mirror-type effect.


So what are your plans for New Years?  We are going to celebrate it with food and our furbabies at the place where we take dog agility classes - We get to eat and the dogs get to do fun runs! 
Does watching exercise count??!

Friday, December 30, 2011

Time for another card sketch challenge!


It's that time of the week again - the Stampin Queens card sketch challenge...Here is the card sketch we used.


I love the spice cake designer paper that Stampin Up has, so I wanted to try making a Christmasy-type card with it with My Digital Studio.  I sent this digital card to family and friends via email.

Here are the cards the design team came up with this week....notice that the next cardmaking holiday is Valentine's Day lol!


 In two of the cards you can see the pretty satin pleated ribbon that will be in the upcoming Stampin Up mini-catalog - sure will save on time with the pleats already done!  Other colors are available too.

Maybe you would like to use this week's card sketch to make up a quick card - using the circles pattern was fun! 

Monday, December 26, 2011

Magnetic mini calendars with matching cards


I think I finally have all my mini-calendars done now!  Here is the first batch I made - I had made the prettiest Christmas card in pool party, one of Stampin Up's newest In Colors...with the velvet ribbon and so I thought I would made a matching magnetic mini-calendars.  This set was for my sister-in-law, who, like me, loves dogs (she has three dogs!). 


After gluing the designer series papers onto the chipboard, and magnetic strips on the back (save those magnetic business cards you get so you can recycle them here!!), I attached the mini-calendar and velvet ribbon.  Then I punched out a cute dog diecut (thanks to Claudia!) on the snowflake embossed pool party paper.


I had to put a little bow on the calendar too and it was fun decorating the little dog - he had a tiny pearl eye and rhinestone on his collar.

I was using my newly done and painted closet shelf to take my pics from - but since my craft room got re-arranged 3 more times (new windows, vents, etc.) I had to try some different locations to put my cards and take pics from.  I just don't think any of these spots work at well at my closet, so I guess I'll have to keep an space cleared out in it just for taking pictures!

Here is the other set of matching card and mini-calendar using the owl punch - this was for my mother and father:


Gee I am thinking that I should have tied a little polka dot bow on the ribbon on the owl calendar too!....
 Now I am sure I much prefer how my pics come out on the shelf in my closet - even against this shiny white wall I am not crazy how
my pics came out....the shininess of the wall seems to make the card/calendar look a little drab.

 But I really like how the card and matching calendars came out - cute!  I'll be posting more of these mini-calendars this week.  Loving that we have another long weekend coming up! 
We went to see the Twilight Breaking Dawn finally!!  Sure am glad that Diana told me to stay for the credits at the end to see a preview of Part 2!!


Sunday, December 25, 2011

Christmas in a Jar and Stampin Queens #18 card sketch cards

Happy Holidays!!
Here are some more holiday-type things for you!
First is Christmas in a Jar!  

What is that, you ask??  
It is just plain yummy, and if you like red velvet cake, you will really 
love this! If you want to see more pictures of this delectable delicious item during its making, you can check it out on Cristena's website.  
But I will post it here too!

 Christmas in a Jar (Cristena Bagne)  
Pics and directions available on her website 
posted on 12/21/11 at http://www.gettincrafty.com/

You will need:
Mason jars - just the small 3" tall ones
Red Velvet Cake Mix
1 - 12oz can of coke (has to be leaded! diet won't work)
cupcake pan (no liners)
cooking spray
cream cheese frosting
decorations - fabric, plastic spoons, tags
 The cream cheese frosting recipe:
(maybe you can use the already prepared cream cheese frosting 
in a can they sell in the stores?!)
2 (8 ounce) packages cream cheese, softened
1/2 cup butter, softened
2 cups sifted confectioners' sugar
1 teaspoon vanilla extract
In a medium bowl, cream together the cream cheese and butter until creamy. Mix in the vanilla, then gradually stir in the confectioners' sugar. Store in the refrigerator after use.

The cake part:
Pour your Red Velvet cake mix in a mixing bowl.
Pour in your coke (you will use a can of dark soda for a dark cake mix, and a clear soda for a light colored cake mix)  Spray the heck out of the cupcake pan with cooking spray - you are going to be able to see your cakes through the jar…so they need to be pretty :)
Fill the cupcake pan with the mixture, and bake. These are going to be SUPER MOIST!!!  Even putting frosting on them is a little overwhelming…so you need to cook them about 3-5 minutes longer than normal. This cake mix called for 22 minutes and I cooked them for 25. Everyone's ovens are different so you may have to play with 
yours until you find the magic number.

After they cool for a couple of moments, SMOOSH them in the bottom of the jars and I mean SMOOSH just cause it is fun :)  Now to put some of the cream cheese frosting in…now you can use a ziplock baggie and cut the corner out of it and put it in that way. But I found the easier way to do it is to take my teaspoon measuring spoon and just scoop it in the jar. That way I can spread it around and not using more than what is needed.  I normally can put 3 cupcakes in each jar with 3 
layers of frosting.


Then just decorate your jar with a strip of Candy Cane fabric, a plastic spoon, and a little stamped cute tag on the top and voila 
you are done!  Christmas in a Jar!!


So I wanted to share the cards from this week's Stampin 
Queens' card sketch challenge #18 too. 

Here is the card sketch #18.


 Here are the cards the design team did.  
Some of the new Stampin Up items that will be in the January mini-catalog were used in these cards.


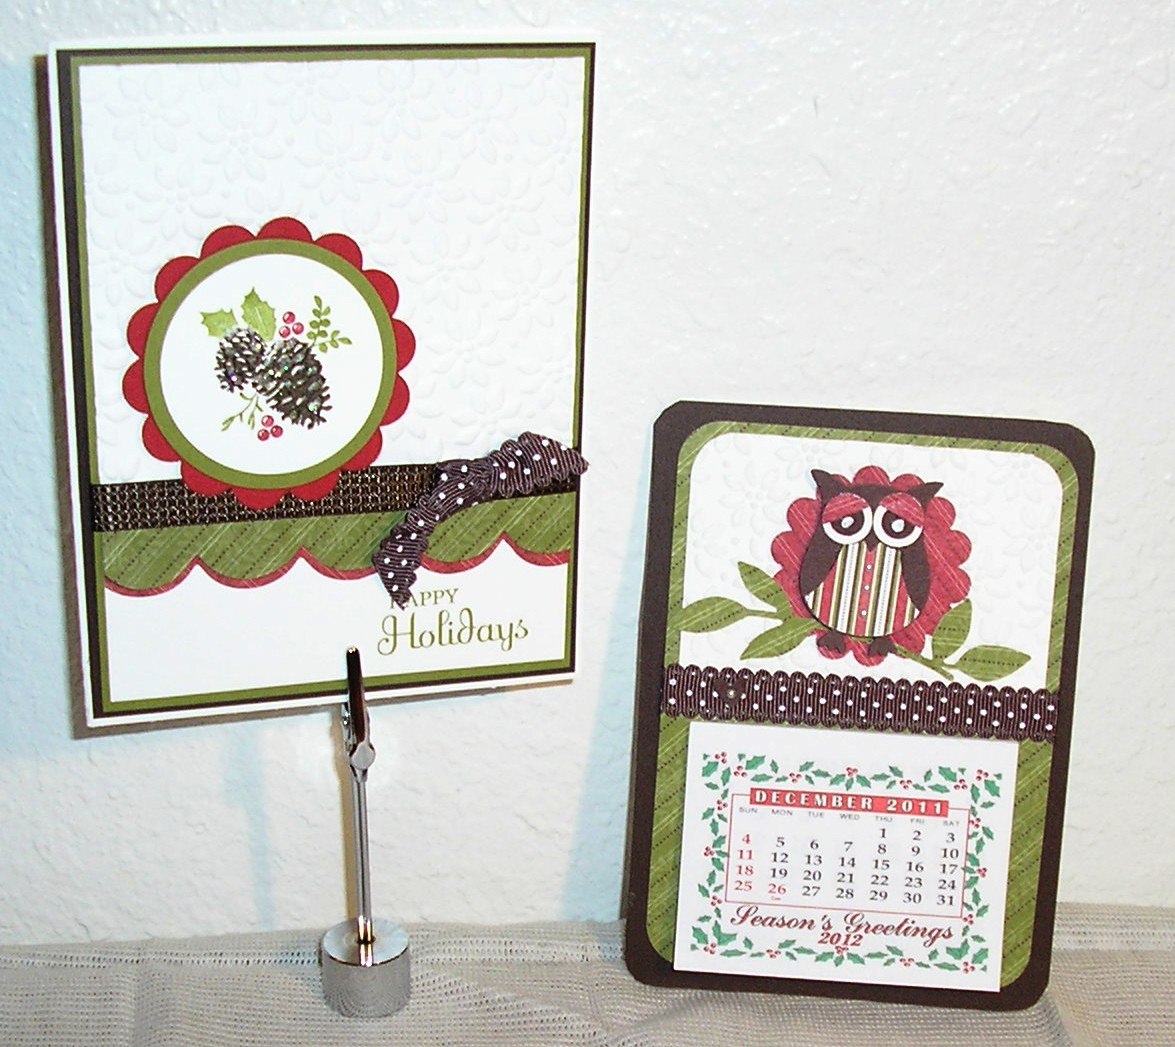
I didn't have time to do one because I was writing out my Christmas cards (way late!) and first had to make up a magnetic mini-calendar to enclose....

It took longer than I planned because my craft room stuff is in 
3 different rooms, so I spent most of the time looking for the stuff to make them with - sure can't wait until my room is finally done!!  
I'll post pictures of the mini-calendars this week; they 
turned out really cute! I made an owl one, cat one, bird ones, and of course, dog ones!!

Hope you are enjoying the holiday season with family and friends!! I know I am enjoying the treats everyone shares lol.


Happy holidays - Our home lightshow!


Happy Holidays all!  
I just had to do it...
This website allows you to make your own Christmas 
lightshow with a picture of your own home!  
 Click on the link above to view it and get the whole effect, twinkling lights and music!

 In reality, this is what our outside holiday decorations look like
Here is a picture taken during the daylight:
 Can you see the two lighted dogs outside?  One is red for our furbaby Inu, and the other white, for our other newly adopted furbaby, Tootsi....

 It was just luck that we found these at the hardware store 
and they were perfect!  And the cactus has a Santa cap on it lol.  


We even had time to take our furbabies to see Santa...


And the Christmas parade that our community does every year - next year I want to have a golf cart and decorate it and ride it in the parade with our furbabies!


Here is a picture of our house outside taken at night:


Check out our brand-new kitchen bay window too 
(Christmas present to ourselves lol)

 
Hope you all have a great holiday season, 
Merry Christmas, and Happy New Year!!