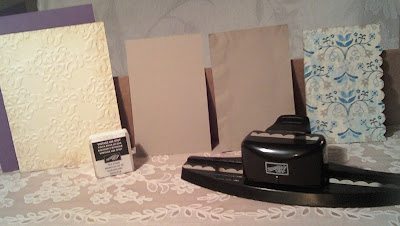
I made another one of those vintage distressed cards that I did an earlier post on (it was a recycled card) - this time with all current Stampin' Up products, since it is for a swap - with my favorite color, purple! I used Perfect Plum and Concord Crush, along with the Marina Mist. I took some pictures when I made these 10 cards - here is how I made this card...
Supplies (all Stampin’ Up):
Perfect plum cardstock – cut 8 ½” x 5 ½” & fold in half for card base
Very vanilla cardstock – cut 3 ¾” x 5” for first layer on perfect plum card
Crumbcake cardstock – cut 4 ¼” x 2 ¾” for second layer
Blueberry crisp designer paper – cut 2 ¾” x 4” for third layer & punch right side edge with scallop border punch
Crumbcake cardstock – cut 3 ½” x 2 1/8” for top layer
Also will need Victoria crochet trim lace, Marina mist 1/8” taffeta ribbon, distressing kit tea stain inkpad, vintage wallpaper embossing folder, Priceless stamp set (heart and “priceless” stamps), concord crush inkpad, clear embossing powder, basic pearls (I used the smallest ones), spray bottle for water misting, adhesive, dimensionals….
Use the tea stain inkpad in the distressing kit to distress the edges of the very vanilla cardstock, then emboss it with the vintage wallpaper embossing folder - feel free to use the tools in the distressing kit to make it look more “vintagey” if you want!

Wrinkle and distress the crumbcake cardstock for the second layer, and/or tear, fold, etc. for more vintageness...
Use tea stain to distress the edges of the blueberry crisp third layer
Stamp the heart with concord crush ink on the top half of smaller crumbcake layer; then stamp the word "Priceless" with concord crush ink and emboss with clear embossing powder on the bottom half as well (note that the heart is not embossed as it will be popped up with another embossed heart later)
With water in the spray bottle, mist the back of this layer; then wrinkle and unfold it 2 times. Use the tea stain inkpad and swipe it across the front of this layer around your heart and the word “Priceless” – now all your layers will look nice and old!
Stamp and emboss the heart with concord crush ink and emboss it with clear embossing powder on a scrap piece of the crumbcake; then cut it out
Adhere the embossed very vanilla layer onto the perfect plum card, adhere the blueberry crisp layer onto the crumbcake second layer, and adhere the small crumbcake layer onto the blueberry crisp layer. You should have only two pieces/layers for your card now. Adhere a piece of the vintage lace across the top layer and then a piece of the marina mist taffeta ribbon on top of the lace
Adhere the layer with the lace and ribbon on top of the other layer, so you will have one piece
that is your card - this looks kinda nice just like this...
Tie a little piece of the marina mist taffeta ribbon around the lace on the card, towards the left side of the card – it looks kinda pretty just like this too, don’t you think?
Now tie a little piece of the lace over the marina mist taffeta ribbon so you cover the knot – The card looks pretty at this stage too!
Put a tiny pearl in the “P” in the word “Priceless” and another tiny pearl in the center of the flower that is on the left side of the embossed heart – I used tweezers to pull the tiny pearl off the paper and carefully put it on the card….took some practice, maybe a magnifying glass might help! Stampin’ Up’s pearls stick really well…Yay, your card is done!
It may seem like a lot of work to make something look old, but definitely worth it, and not difficult,
just quite a few steps. Hope you enjoyed this!


No comments:
Post a Comment