

Every year I make mini-calendars to send to my family and friends who are on the east coast and put them with their Christmas cards. This way they will think of me every month, right?!
One thing they can count on is that I only just get them done and in the mail just before Christmas....lol. And when they get them will depend on the mail - I see that there was a big snafu with UPS late holiday deliveries. Did that affect any of you? Fortunately I pack my mini-calendars nicely in an envelope that is accepted by the USPO so I am pretty sure they got theirs just fine.
But I wanted to share some pictures I took of some of the mini-calendars.
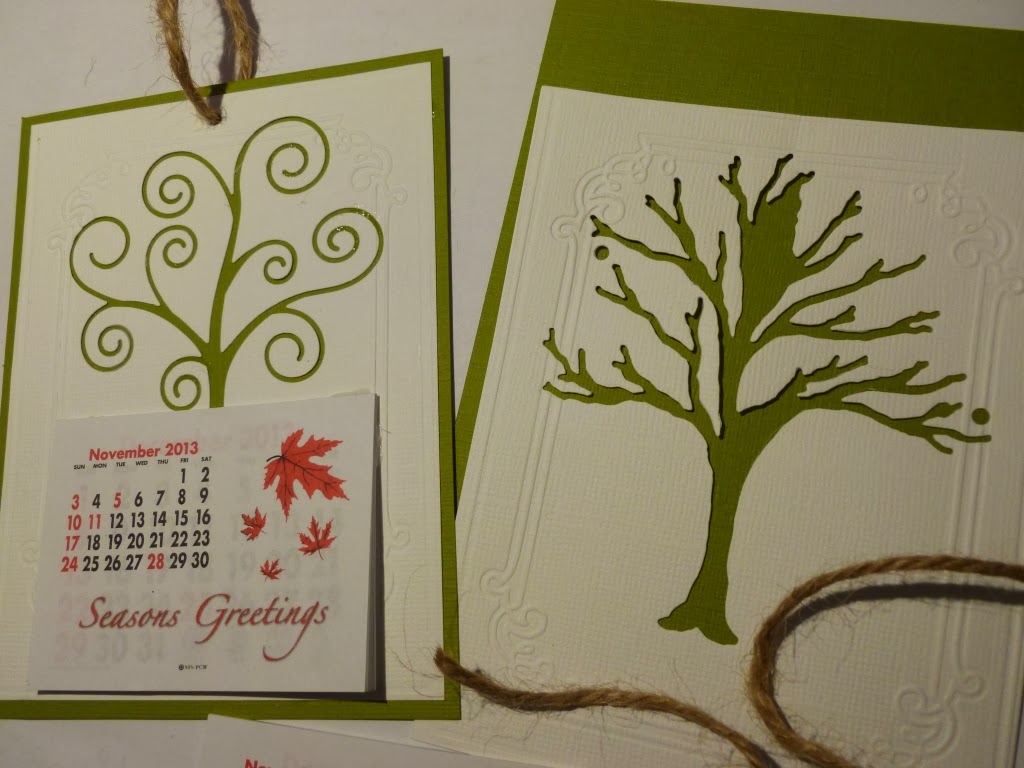
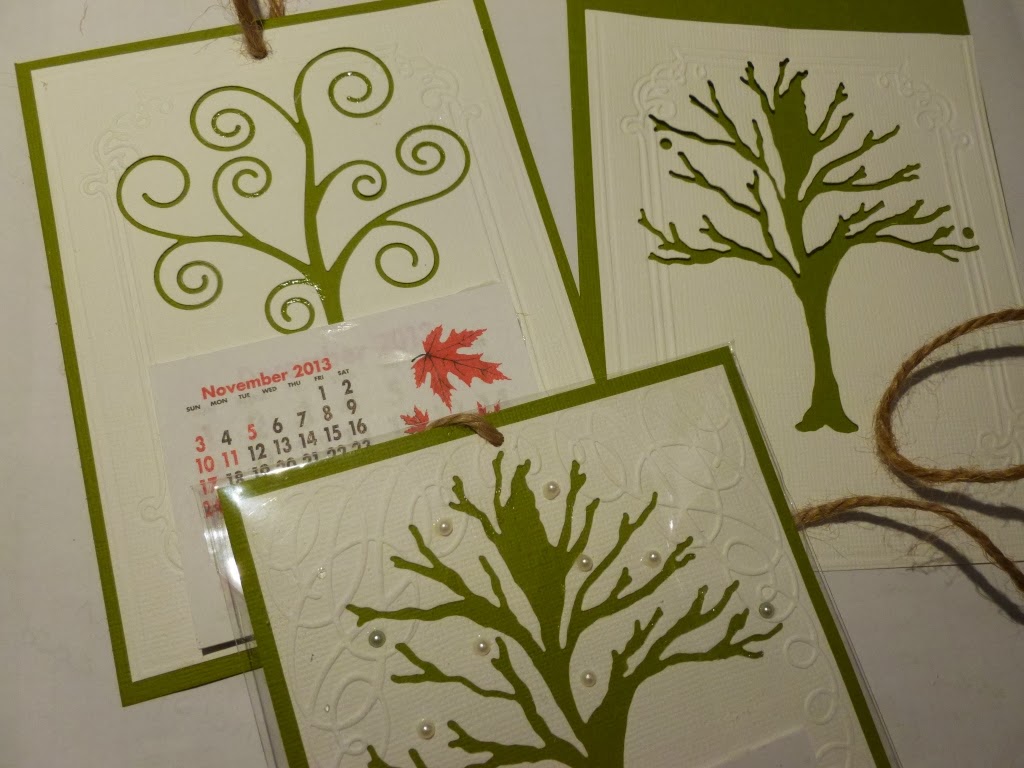
I used the textured white cardstock you can get from Stampin' Up and old olive cardstock. I had two tree diecuts I liked and couldn't decide which one to use, so I did some of each!
One of the tree dies is from Impression Obsession.

The white cardstock was embossed with different embossing folders by Cuttlebug.
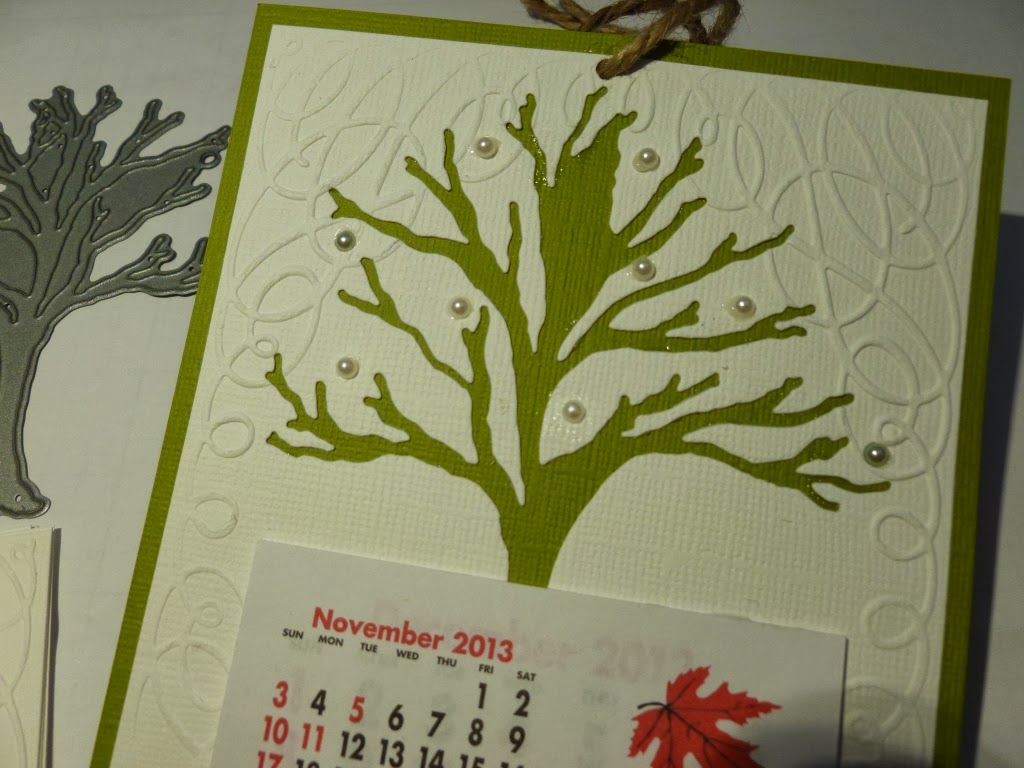
I decorated the trees with pearls, rhinestones, or both. The jute string went through the hole at the top and I didn't tie it so that the calendar would lie flatter in the envelope and go through the mailing sorter.

I had ordered the mini-calendars earlier this year - so I just had to remember where I had put them!


The old olive cardstock was also textured (from the holiday Stampin' Up catalog that just ended) and looked beautiful and elegant with the white textured cardstock.


I think the thing that was most time consuming was putting the green glue on the backs to make sure all the branches would stick to the paper - I did that while I was watching television; all those holiday shows!


All of the diecuts and embossing folders I used can go through Stampin' Up's big shot machine. And now with the magnetic platform, it is super easy to make sure the metal diecuts don't move around. In fact, I was able to cut two trees at a time!


Well, since I didn't make any extra calendars for myself, I will just have to make a few more in different colors!
No comments:
Post a Comment